

Here is a step by step how-to if you have a rusted sticking latch or a latch that wont release your rear hatch open. I had this problem for the past month on my 2004 SE AWD but finally needed it fixed for my upcoming trip. This will save you a ton of money and can be done by almost anyone. Tools you need are:
Flathead screw driver
Ratchet w/ 10mm socket
WD-40 and some PB Blaster if possible.
Small wire brush (A scruff pad or some sand paper might work as well)
A friend (only needed if your hatch is stuck closed like mine was)
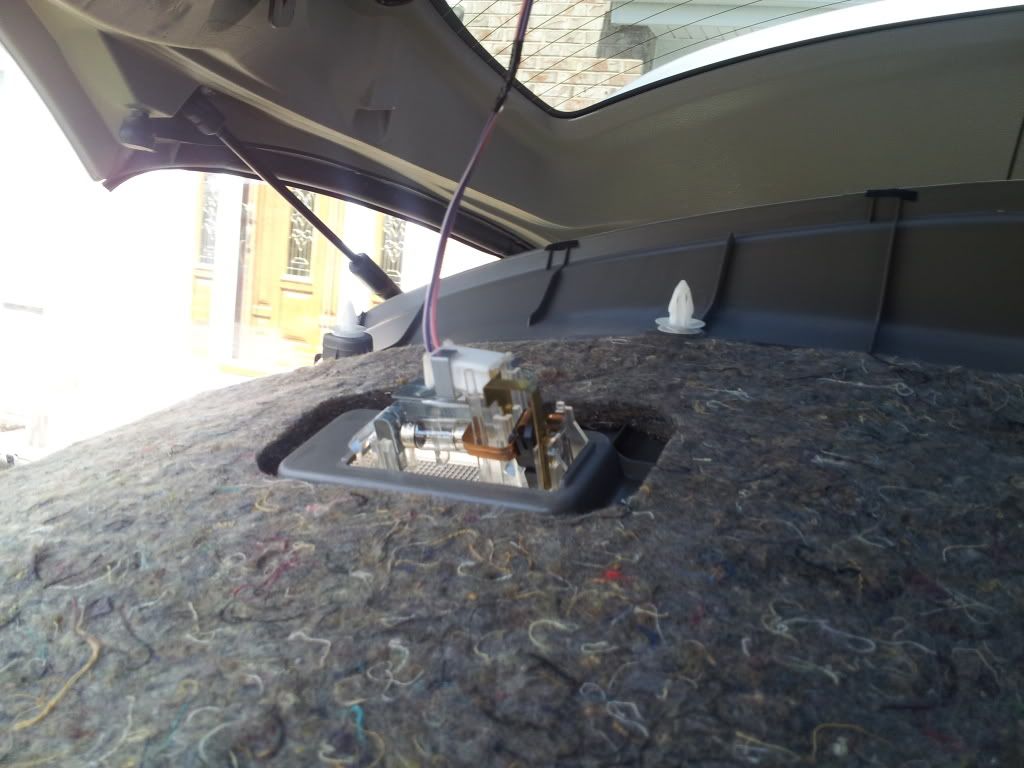
If your hatch will not release open at all, you will need to fold down your rear seat and climb into the trunk. There is an access hole that needs to be popped open to get to the latch.

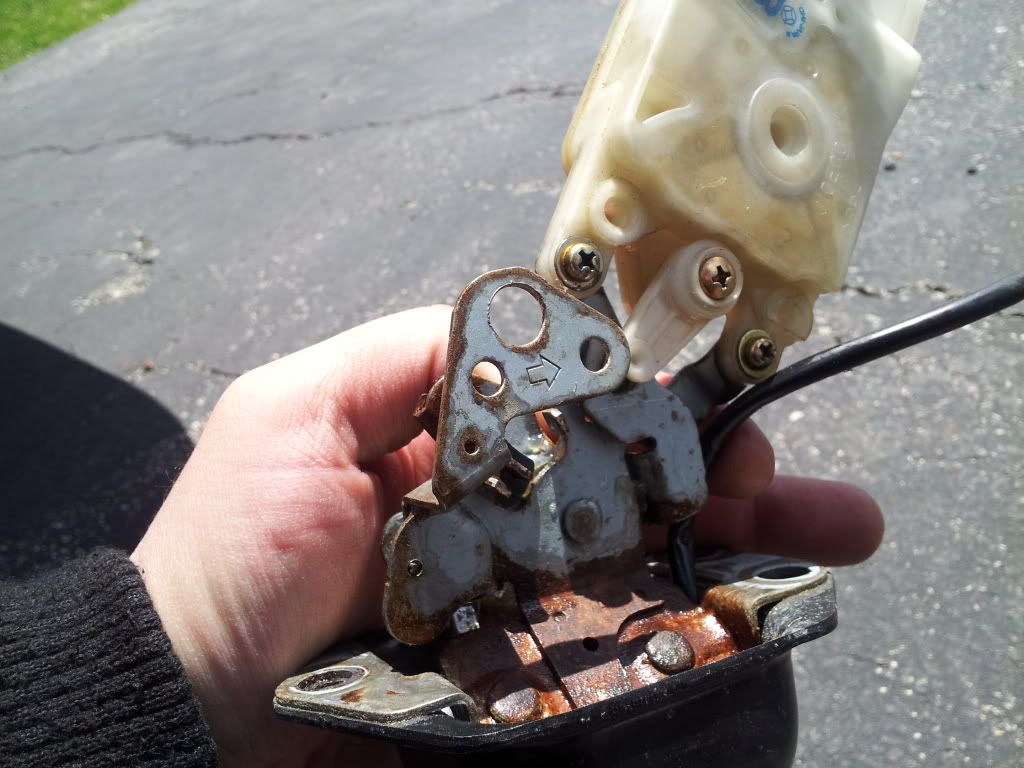
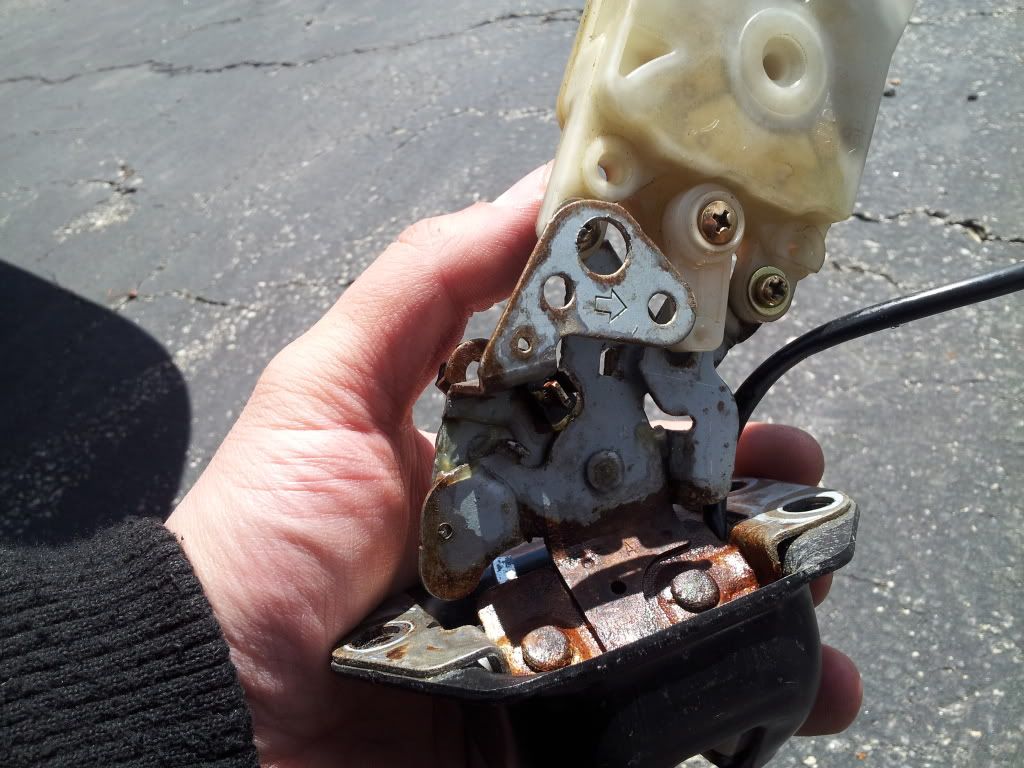
Next, you can use your key fob to lock and unlock the car to see if the machanism moves. It will most likely only move to one direction. Take your flathead and move the metal part (part with the holes in it) to the right and the left a few times. This part is what keeps it locked and unlocked in place. You can use your key fob again to lock and unlock the car....if it free'd up from enough rust, you should slightly see it moving back and forth.
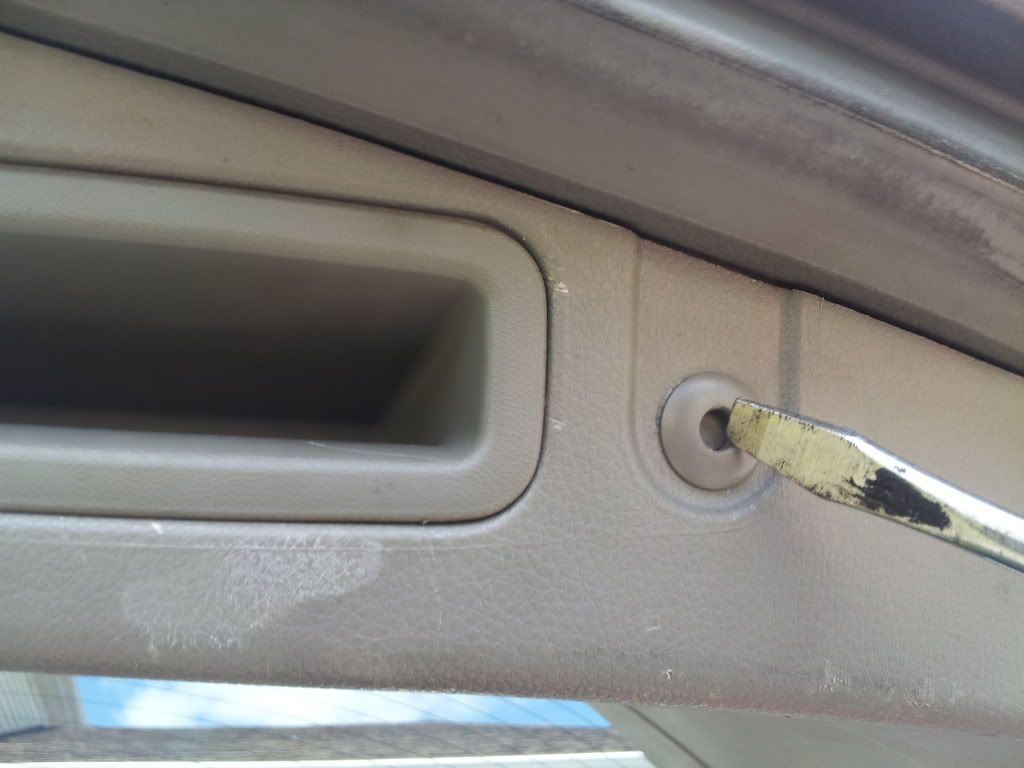
You can now have your friend stand on the outside of the car. Place your flathead on the part further in, just as pictured below. Firmly press the mechanism up and ask your friend to pull on the lever outside to have them pop the hatch open. This might take a few tries as I do not exactly remember how everything was positioned as it released open.

You should now have your hatch open. There are (4) plastic tabs that keep the large interior portion on the hatch in place. Push the center of the tabs in and place your flathead under the outer section to pull them out. Be careful not to sctach up the plastic.

With the (4) tabs out, you can now pull out the plastic piece that helps you close down the latch. Also be careful not to scratch the plastic.

You can now start pulling down the large plastic piece and unclipping it from the hatch. I start right by the window and then use a flathead to pull back the plastic on both the sides. Make sure to use both hands so you can catch the large piece...do no let it drop since there are two wires that need to be unplugged from the lights before you can set it down.


With everything unhooked and the large piece in your hands, unhook to lights by pulling back on the white sockets. They side right out with ease. Place the large plastic piece safely inside of the car and out of the way to prevent it from any damage/scratching.
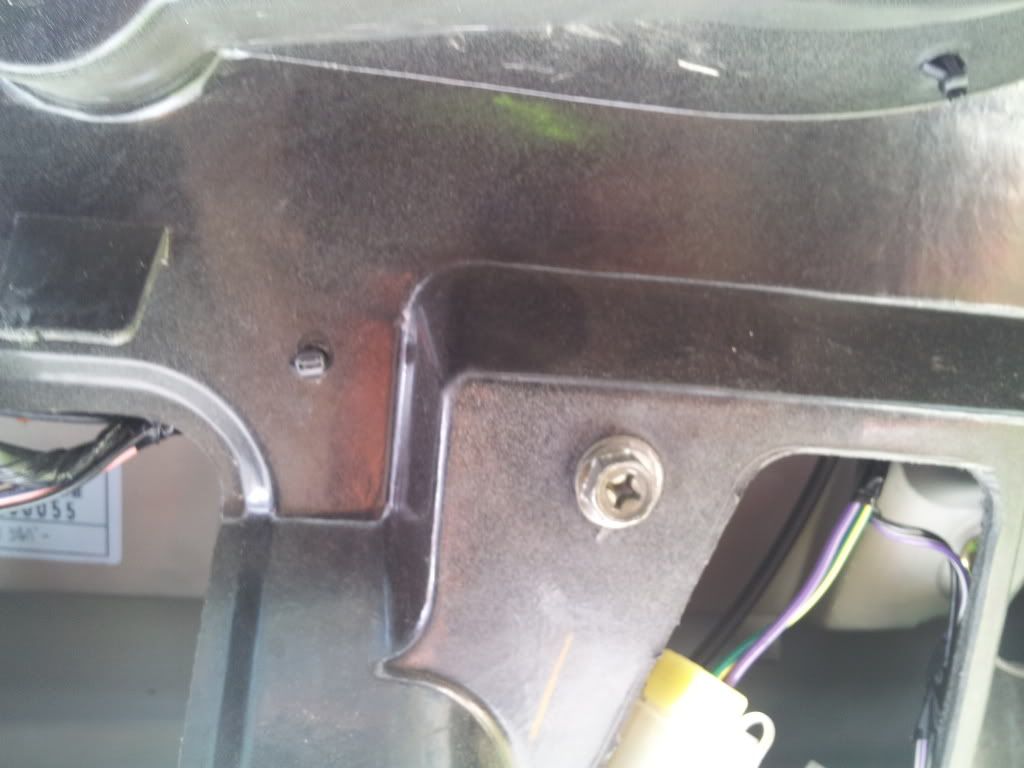
Next, you will have (3) 10mm bolts to remove. One on the right and two on the left.


You can now look at the inside of the hatch. There are two wire plugs that will need to be removed. One has the yellow clip socket and the other has the white socket. Press the white one in and pull back out. With the yellow socket, you need to press in the 2 little bent clips to pull the entire socket out...with the yellow portion attached to it.


Now, press the white tabs inwards (where the white socket was mounted) towards each other with your fingers and push the piece in to pop it out of the hole.

You can now remove the last 10mm bolt.
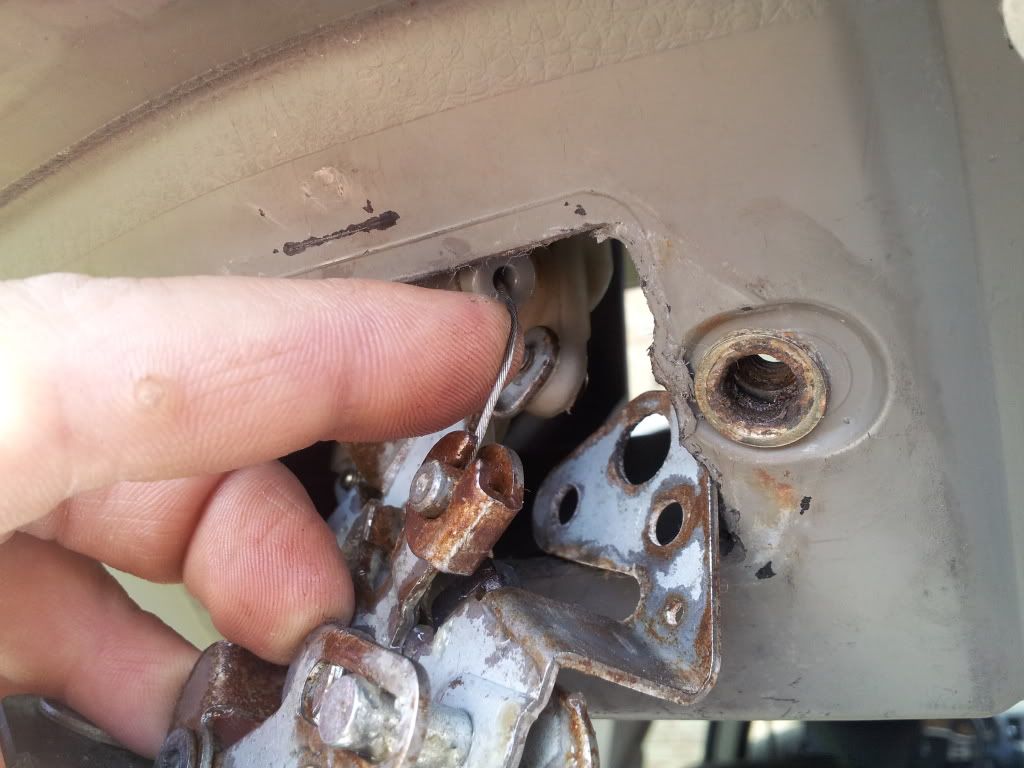
With the last bolt out, you can now drop down the entire assembly just enough to get to the cable that is connected to the outside lever. Pop the gray plastic piece on the cable outward out of its bracket.

Pull the cable up and pop the end of it out from the other side with your finger or a screw driver if needed. Once the cable is removed and out of the way, you can drop the entire assemble down and out of the car.

You can now begin examining the entire assembly by moving the levers back and forth. They should be pretty rough due to all the rust and will not all the pieces to move easy or retract as they should.
Your next step should be to take some PB Blaster (or WD-40 if you dont have any PB) and soak all the rusty metal. Move the locking mechanism along with the lever portion where the cable was connected to back and forth repeatedly.... spray it some more and continue doing so until the lever moves more freely.
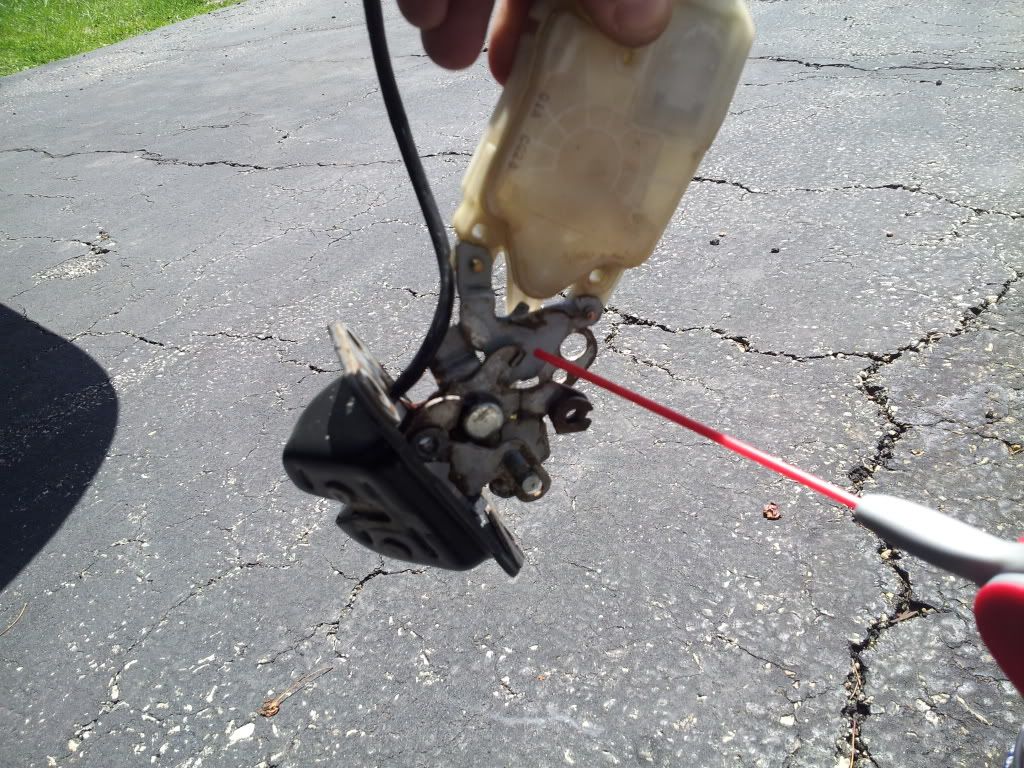
You can now use your wire brush to scuff down some of the rust. Spray it down and scuff some more anywhere you can, until you see it washing down a bit of rust. You can continue spraying it down and continue moving the lever repeatedly until the lever starts to retract on its own. This might take a few minutes to do...the more you move and spray it, the cleaner and more free it will get. You have to continue doing so until it retracts back fast like a spring.
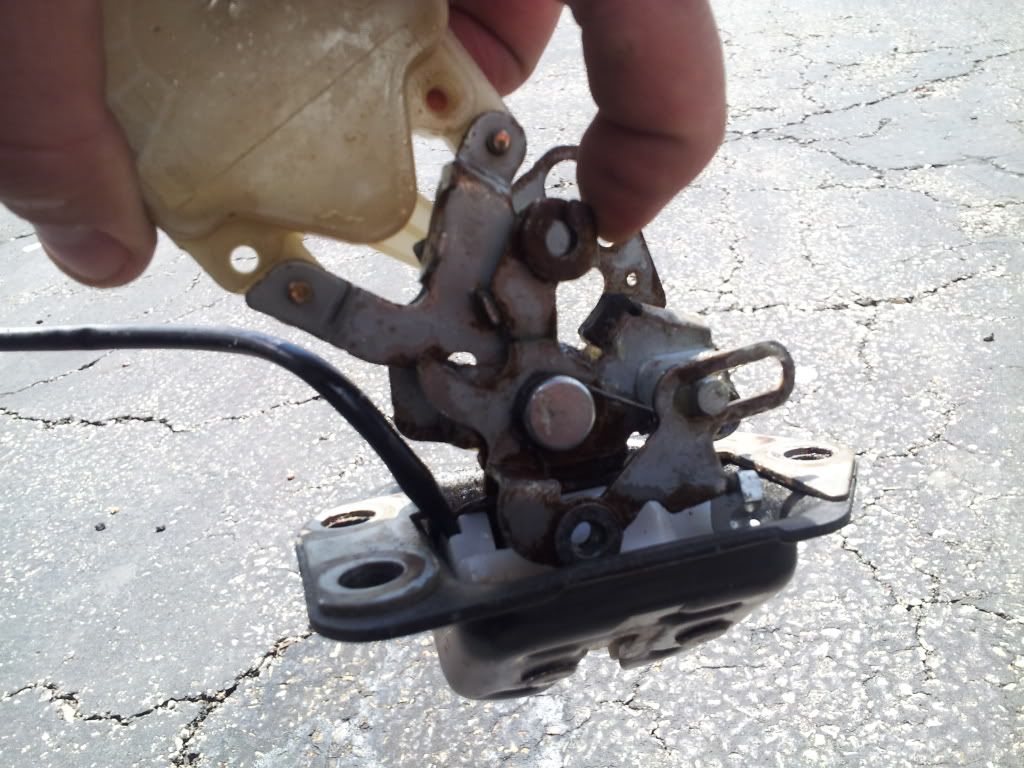
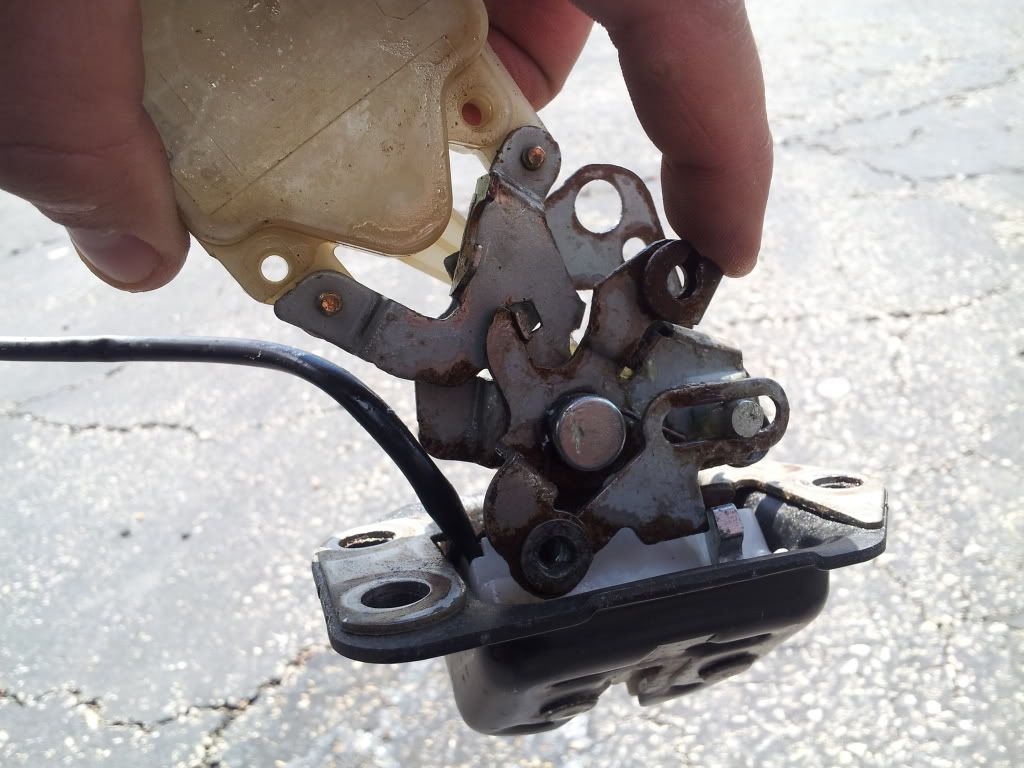
You can do the same with the locking mechanism. Move the piece to the right and the left until it feels like its poping back and forth more freely.
I also added a little grease to it with my finger. Not sure if its doing much but im sure it will keep it lubed up for some time. Other than that, you are now done with everything.... and can reverse the process backwards. Everything went in easy and I did not run into any issues with difficulty. Everything works GOOD AS NEW! Hope this helps anyone with sticking or rusted out levers! :29:
Flathead screw driver
Ratchet w/ 10mm socket
WD-40 and some PB Blaster if possible.
Small wire brush (A scruff pad or some sand paper might work as well)
A friend (only needed if your hatch is stuck closed like mine was)
If your hatch will not release open at all, you will need to fold down your rear seat and climb into the trunk. There is an access hole that needs to be popped open to get to the latch.

Next, you can use your key fob to lock and unlock the car to see if the machanism moves. It will most likely only move to one direction. Take your flathead and move the metal part (part with the holes in it) to the right and the left a few times. This part is what keeps it locked and unlocked in place. You can use your key fob again to lock and unlock the car....if it free'd up from enough rust, you should slightly see it moving back and forth.
You can now have your friend stand on the outside of the car. Place your flathead on the part further in, just as pictured below. Firmly press the mechanism up and ask your friend to pull on the lever outside to have them pop the hatch open. This might take a few tries as I do not exactly remember how everything was positioned as it released open.

You should now have your hatch open. There are (4) plastic tabs that keep the large interior portion on the hatch in place. Push the center of the tabs in and place your flathead under the outer section to pull them out. Be careful not to sctach up the plastic.


With the (4) tabs out, you can now pull out the plastic piece that helps you close down the latch. Also be careful not to scratch the plastic.

You can now start pulling down the large plastic piece and unclipping it from the hatch. I start right by the window and then use a flathead to pull back the plastic on both the sides. Make sure to use both hands so you can catch the large piece...do no let it drop since there are two wires that need to be unplugged from the lights before you can set it down.


With everything unhooked and the large piece in your hands, unhook to lights by pulling back on the white sockets. They side right out with ease. Place the large plastic piece safely inside of the car and out of the way to prevent it from any damage/scratching.

Next, you will have (3) 10mm bolts to remove. One on the right and two on the left.


You can now look at the inside of the hatch. There are two wire plugs that will need to be removed. One has the yellow clip socket and the other has the white socket. Press the white one in and pull back out. With the yellow socket, you need to press in the 2 little bent clips to pull the entire socket out...with the yellow portion attached to it.


Now, press the white tabs inwards (where the white socket was mounted) towards each other with your fingers and push the piece in to pop it out of the hole.

You can now remove the last 10mm bolt.

With the last bolt out, you can now drop down the entire assembly just enough to get to the cable that is connected to the outside lever. Pop the gray plastic piece on the cable outward out of its bracket.

Pull the cable up and pop the end of it out from the other side with your finger or a screw driver if needed. Once the cable is removed and out of the way, you can drop the entire assemble down and out of the car.


You can now begin examining the entire assembly by moving the levers back and forth. They should be pretty rough due to all the rust and will not all the pieces to move easy or retract as they should.
Your next step should be to take some PB Blaster (or WD-40 if you dont have any PB) and soak all the rusty metal. Move the locking mechanism along with the lever portion where the cable was connected to back and forth repeatedly.... spray it some more and continue doing so until the lever moves more freely.

You can now use your wire brush to scuff down some of the rust. Spray it down and scuff some more anywhere you can, until you see it washing down a bit of rust. You can continue spraying it down and continue moving the lever repeatedly until the lever starts to retract on its own. This might take a few minutes to do...the more you move and spray it, the cleaner and more free it will get. You have to continue doing so until it retracts back fast like a spring.


You can do the same with the locking mechanism. Move the piece to the right and the left until it feels like its poping back and forth more freely.


I also added a little grease to it with my finger. Not sure if its doing much but im sure it will keep it lubed up for some time. Other than that, you are now done with everything.... and can reverse the process backwards. Everything went in easy and I did not run into any issues with difficulty. Everything works GOOD AS NEW! Hope this helps anyone with sticking or rusted out levers! :29:


